Let's wrap-up things, shall we?
Since the last post, I've invested a lot of time to get the car street worthy - honestly, I've had enough of tinkering and toying around. I wanted it on the street, I wanted to use it in my daily commute. In this post I'll collect all loose ends which I did not report about yet up to a stage where I dared to address the testing center and book a date for a (first) inspection.Batteries again

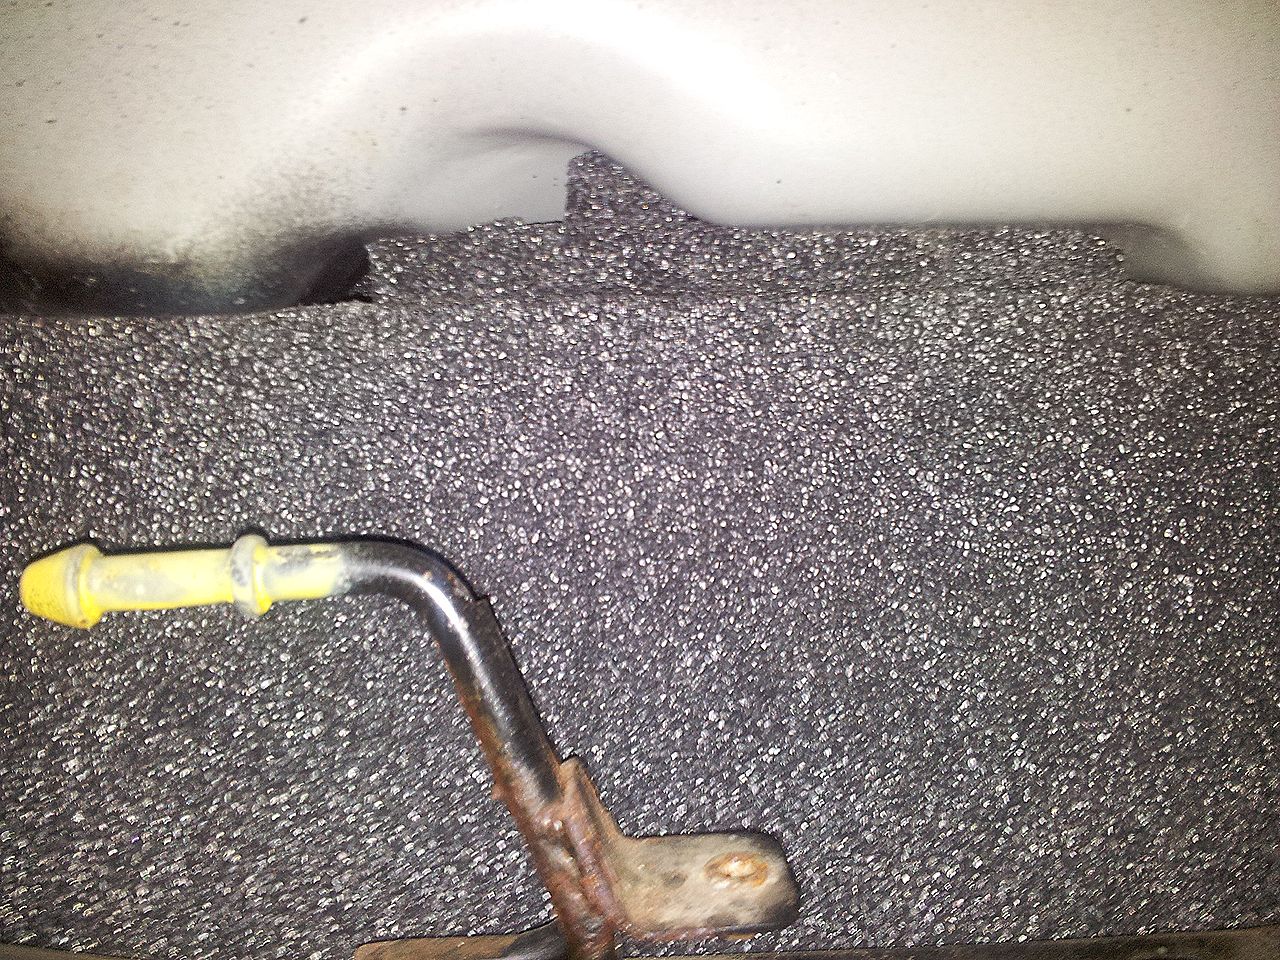
 Well, the front battery box was installed, the carriage for the batteries under the car as well and I even installed a crate for the batteries in the trunk. All well. But what about water, dirt, debris and salt spraying up from the street? How to protect these poor cell terminals from corrosion? Well, I had a plan from the beginning but with the help from Matthias from www.fahrzeugausbau.ch it got even better: I wanted to add a PE (Poly Ethylene) plate as main shield and just fill all gaps with construction foam - you know, this yellow sticky mass which extends by a factor of 3 or more. Matthias suggested to also use PE foam. He provided me with a load of cut-offs from his construction work and man, did it come in handy! Not only was I able to easily secure the cells in the construction, but I also filled up the major holes. So I had to use less construction foam instead . Well, I still used 4 bottles - but mainly due to my unprofessional handling.
The PE plate was also fabricated by Matthias and together we created an attachment system to hold the plate in place. The plate is 6mm thick and is able to hold of 9mm bullets. So we have enough protection from stones and debris. I wonder if Tesla's shield would hold up against a 9mm bullet :)
I know the yellow construction foam looks scary and ugly at first. But once you cut it down with a knife to the right proportions and paint it black with bitumen spray, it just vanishes. And together with the PE foam I was very cautious not to miss any spot and get all gaps filled water-tight. Well, at least spray water-tight :) (see last three pictures)
 |
 |
 |
 |
 |
 |
 |
 |
 |
 |
 |
 |
Cabling
Some impressions from my HV cabling. The first picture is probably the most noteworthy and it's also provided in a higher resolution so you get a glimpse on how the HV distribution was created. On the left side you see the red distribution bars for HV+ and on the right the black copper bars for HV-. Between the red ones you see two contactors. The left one's the secondary HV contactor. It closes after the HV contactor in the trunk did engage and the pre-charge cycle is completed. The right one will be used for fast charging via Chademo in the future. In the middle you see an HV relay which connects the green resistor for pre-charging. And on the lower right you see the shunt for coulomb metering (AH). The HV box is mapped pretty much 1:1 in the control diagram. |
 |
 |
 |
 |
 |
EHPAS Pump
 This beast is a bit the bad boy in the car. In emergency mode (no CAN control messages) it's power is barely enough to keep the electro hydraulic power assisted steering running for my heavy S80 - but more annoying is the humming noise it creates. Even packed into foam rubber and covered by the front bumper, it creates too much noise for my taste. I started thinking about using the emergency brake switch connected to GEVCU to switch off the pump - so it'd be more quiet in a traffic jam. But with some music it's ok. (I'm oversensitive, I know.. it's just that the pump destroyed my fantasy of an absolutely quiet car).
 But the worst thing is that although I bought this pump via an official retailer, I get absolutely no support. Not even a CAN matrix or guide.. or just even a CAN ID. Same old song from the manufacturer TRW : no support for non-OEM's... #@&##@ !!!
I could live with the first two draw-backs but the third one brings me to the point where I'd definitely not recommend this pump. Shame on you TRW - you're actually the only player in the whole game who gave absolutely no support for your 600.- pump.
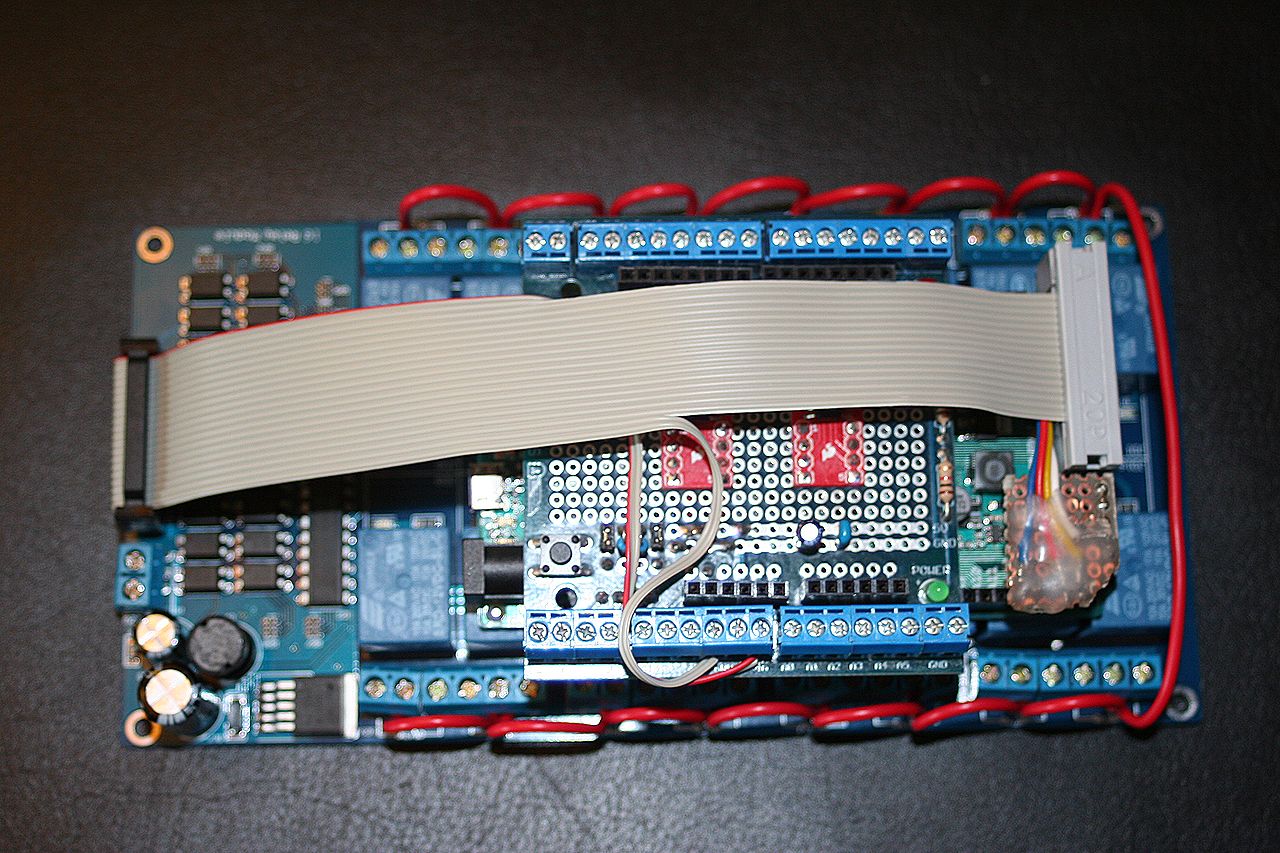
GEVCU Extension
The GEVCU is a great piece of hard- and software. Especially with the WiFi chip and the web-interface Charles Galpin and I created for configuration and monitoring.. I just love it and people freak out when they see it displaying 10 values with gauges in real-time. But it has some drawbacks:
- Not enough digital output ports (8 are not enough for my conversion)
- The MOSFET's are not intended to handle the big inrush current when closing a HV contactor
- It lacks some inputs e.g. for single wire temperature sensors or pulsed flow meters.
- It has no SW-CAN (single wire) bus to communicate with the Eberspächer heater

GEVCU communicates via CAN bus with the extension board and tells it to engage the pre-charge relay, the contactors, start the heater or coolant pump and fan. And in return for that, the GEVCU extension board reads temperature and water flow measurements and reports them back to GEVCU via CAN also. There are also some safety features built in so should the two boards get out-of-synch, the HV contactors will be released or not closed at all (state machine on both boards).
I also created one last video before hitting the road from some old dusty recordings.
 |
 |
 |
 |
 |
Charger connector


The only place the connector for charging should go is of course where you used to hook up the gas nozzle. A friendly fellow by the name of Andre Te Sla (no joke !) runs the company www.electroscout.ch. He was able to provide me with a receptacle which fit in perfectly and also a 1-phase charging cable that I can hook up to the car and a red CEE-16 plug. I created myself some adapters for CEE-32 and Swiss household sockets. Works like a charm. All that's missing, is the 880 Ohm resistor between ground and a 12V PWM signal provided by official charging stations so the signal goes down to 6V and the charging process starts. But until now I was happy with dumb 230V sockets.
Versuchs vielleicht doch noch mit der Pumpe aus der Mercedes A-Klasse.....
ReplyDeleteDie ist schön geregelt und läuft einigermaßen leise.
Ich hab die jetzt an meinem Prüfstand für meinen Golf-Antrieb dran und
bin zufrieden! Die kriegt man für ein Butterbrot, gebraucht unter 50 Euro
Can oder so war da nie vorgesehen, Dauerplus und eine Steuerspannung zum Einschalten,
die original von der LiMa (Ladekontrolle) kommt.
Ohne Last regelt das Teil runter, bei Last hoch.
Na ja, für CAN-Daten brauchst Du wohl einen fähigen und Dir wohlgesonnenen
Volvo-Mechatroniker...... oder Du machst Dich selber auf die Suche...
Can aufzeichnen, und in die Pumpe einspeisen...... nichts für Eilige!
Ansonsten: Das feut mich, dass Du endlich so weit bist, dass die Zulassung in
greifbarer Nähe ist! Das mit der Achslast bringst Du auch noch auf die Reihe!
Federn vom V8 werden sich da wohl nicht vermeiden lassen.
Viel Glück und gute Fahrt!
Franz
Hi Franz. Vielen Dank für deinen Tip! Das werd ich mir sicher mal anschauen.. möchte aber erstmal die Prüfung ganz hinter mich bringen.
ReplyDelete